Article Update: Character Ambient Occlusion
Hello everyone!
In this week's update, I like to share the things I've learned using UE4 post-process ambient occlusion feature and how I set up my character material AO channel. I will start by describing the problem I encountered while tweaking post-process AO; the solution I came up with and its side effects; some comparison images under different post-process and material AO setups; finally, the result of my character shading.
My game relies heavily on post-process AO to generate detail shadow for all of the actors in the scene, the effect works well in most cases especially for static mesh, however, when it comes to skeletal mesh the outcome of the AO effect seems rough and somewhat ugly.
 (the default AO bias setting generates too much noise around the chest area of the skeletal mesh, giving it an unpleasant look; after adjusting the bias parameter, noises are eliminated but so are the finer details)
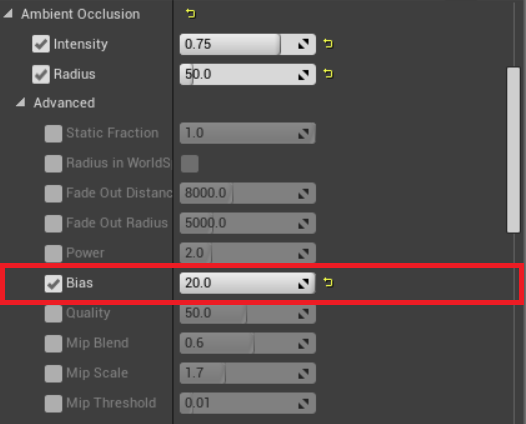
There is a bias parameter in the post-process AO settings, which allows me to control the amount of AO on a flat surface. A bias value of 20 can eliminate the artifact at the cost of losing detail shadow on the mesh. I've then tried various setup combinations under a bias value of 3 and 20, but sadly, the result either looks dark and gritty or smooth and bland. To achieve a smooth and detailed outcome by tweaking post-process AO alone seems like an impossible challenge.

(I've tried various combinations of AO intensity, radius, quality under a bias value of 3 and 20, the results are either too dirty or too bland, striking a balance seems impossible)
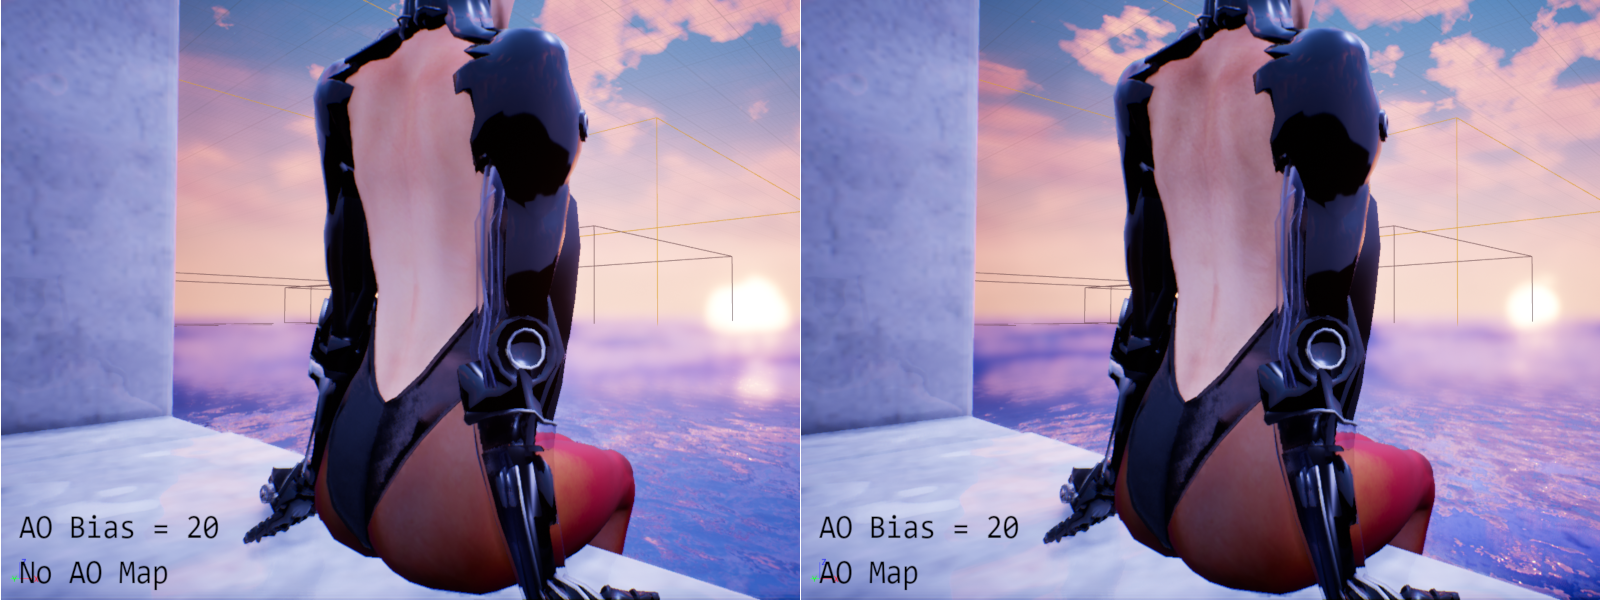
After some contemplation, I found out the problem with this approach is that without an AO map, the engine tries to calculate AO base on vertex information, which alone, cannot accurately represent the finer detail of the model. I then generated an AO map and plugged it into the material's AO channel, under a bias value of 20 the previously vanished details are back, however, due to the high value of bias, areas that are supposed to have a strong AO effect - because of its geometry structure - are now less visible.

(with a bias value of 20, AO map bring back the detail of the character, however, the areas around her spinal cord where AO should be most prominent is less visible)
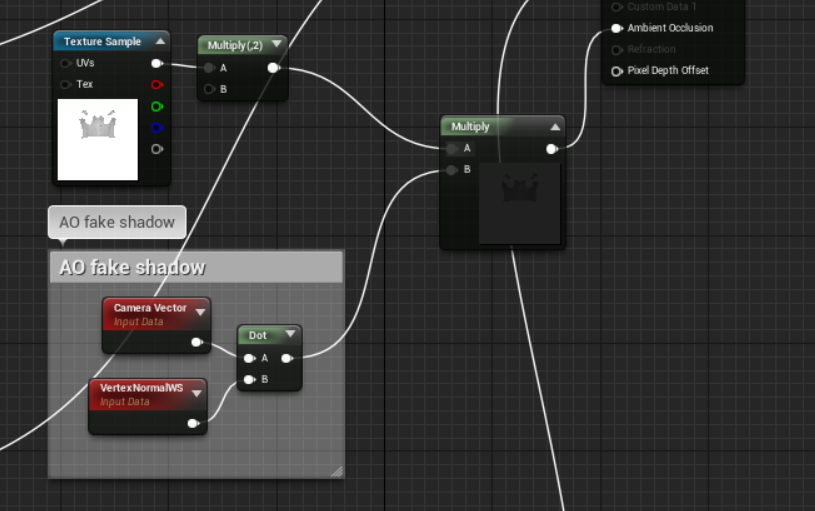
To bring back vertex information, I decided to fake it by calculating the dot product of the camera vector and vertex normal, multiply the dot value with the AO map and plugged the output to the AO channel. The idea is to let areas that aren't facing the camera directly to have a lower value, thus, stronger AO effect.

(the resulting AO will be most prominent on faces that aren't facing directly to the camera - usually at the edge or the sunken/contracting area of the geometry)

(noticed with fake shadow, the AO around her spinal cord reappear under bias value 20; in addition, I've found out the fake shadow also vividly simulate the property of a stocking material around her thigh, which is a welcoming surprise :P)
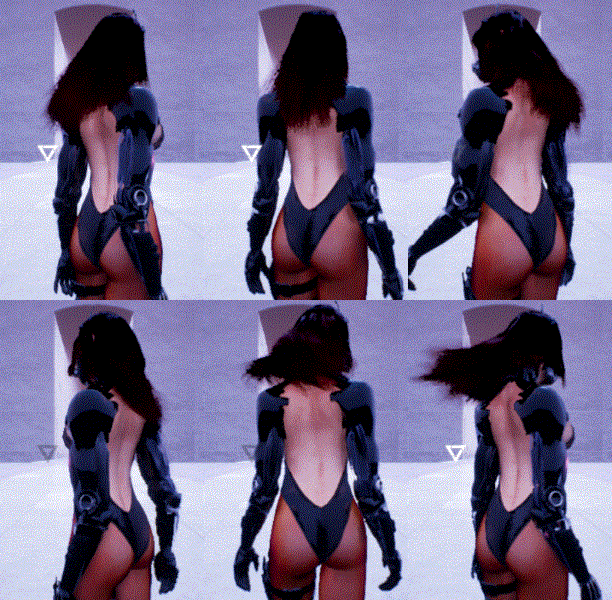
Finally, here is an animated image to better showcase the final result of my character AO set up. With a high bias value combined with some manipulation of material AO channel, I think I've done a good job eliminating the artifacts from post-process AO whilst preserving the finer detail of the character model.

(this is the result of my AO set up, noises are eliminated and details are preserved)
If you enjoy reading this article, feel free to leave a comment and share your thought on this subject!
Have a great weekend! :3
Get 《Drifting : Weight of Feathers》
《Drifting : Weight of Feathers》
3rd-person action, fluid animation, versatile movement
| Status | In development |
| Author | rit2040 |
| Genre | Action, Shooter |
| Tags | 3D, Fast-Paced, Female Protagonist, Parkour, Singleplayer, Third-Person Shooter, ue4, Unreal Engine |
| Languages | English |
More posts
- 《Drifting : Weight of Feathers》 Demo Ver 2.9 Now Available!Oct 09, 2021
- New Game Trailer and Dev Live Streaming Coming Soon!Sep 25, 2021
- 《Drifting : Weight of Feathers》 Demo 2.8 Update - New Hairstyle 'Youthful' a...Sep 04, 2021
- 《Drifting : Weight of Feathers》 Demo 2.7 Update - Gamepad Support and Online...Aug 02, 2021
- 《Drifting : Weight of Feathers》 Major Tutorial Overhaul in Ver2.6 UpdateJul 04, 2021
- 《Drifting : Weight of Feathers》 Opening Cinematic - Target EliminatedMay 22, 2021
- 《Drifting : Weight of Feathers》 Demo Ver. 2.1 Major Update!Mar 20, 2021
- 《Drifting : Weight of Feathers》 Played by ArrowSan1999 - A soothing voice an...Feb 07, 2021
- 《飄移 : 羽毛的重量》 2021 台北國際電玩展 新聞資料袋Jan 12, 2021
- 《Drifting : Weight of Feathers》 TpGS 2021 Press KitJan 12, 2021

Leave a comment
Log in with itch.io to leave a comment.